More Beetleweight Progress!
More Progress!
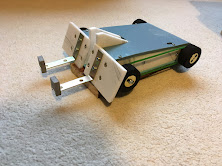
We turned our robot to four-wheel drive with the help of four plastic pulleys we found and drilled to fit to the motor shafts at the back and the M4 bolts at the front. The transmission was provided by two identical elastic bands. Not perfect, but still an improvement on the previous two-wheel drive!
After this we ordered a large number of things, including our brushless motor and esc, and weapon and drive pulleys from the Technobots website. These purchases also included a length of polyurethane belt for the drive and weapon systems. When our Technobots order arrived, we started to fit the drive pulleys. We ordered 30mm diameter V pulleys, so we needed to drill the centre holes to fit onto the motor shafts and bolts. For the front wheels, our previous technique of gluing the pulley to the wheel hub didn't work with these pulleys, so instead we bolted the wheel and pulley together so it cannot come undone. At the back, the wheel and pulley are unconnected but this might change in the future. As for the drive belt, we cut two equal lengths from it and then held both ends over the hob and stuck it together. The belt fits on nice and tightly, and makes the robot much easier to drive.This is a lot of progress towards a finished build, and I am very proud of this so far.


Comments
Post a Comment